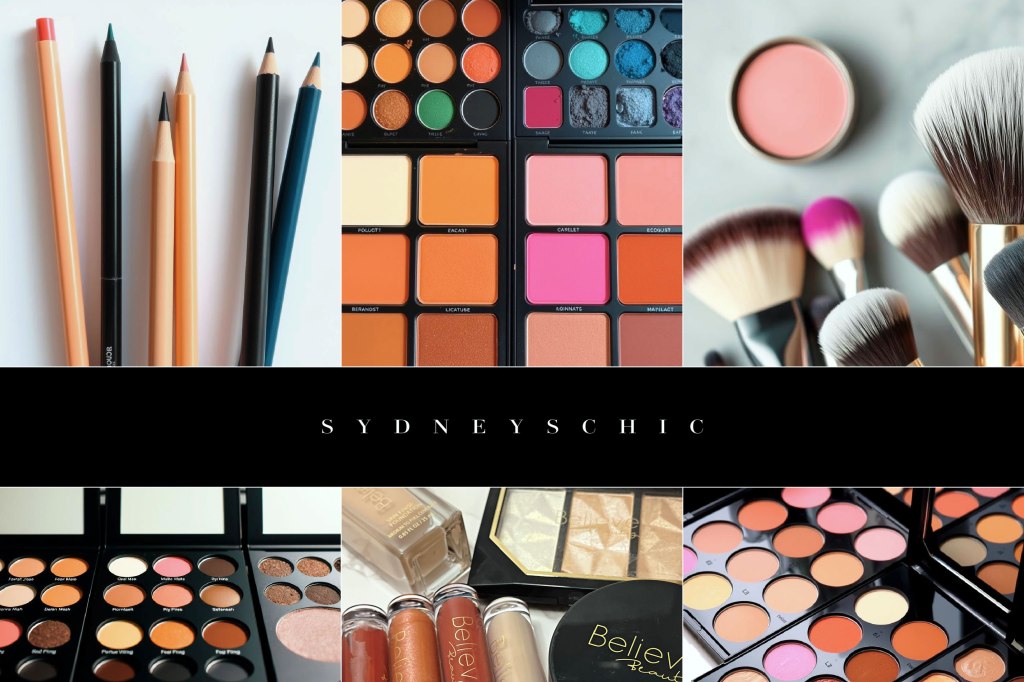

This week, I decided to revisit the topic of makeup! I’ve noticed that my previous makeup related posts tend to be particularly well received, and I’m always happy to share what I’ve learned. So, I thought it would be fun to pull back the curtain and share a few of my go-to makeup tricks and personal hacks. Hopefully, you’ll find some of them helpful and I will be selecting ones that I think are really easy and applicable to everyone.
Now, a quick disclaimer: I want to be upfront and say that I’m by no means a professional makeup artist. I don’t have any formal training or certification and most days I feel like makeup is just a step up from clown paint. However, for what it’s worth, I often get complimented on my makeup when I’m getting ready for events or special occasions. So, I figure I must be doing something right—when in doubt, blend it out, babe!
My intention here is simply to share what’s worked for me. Feel free to cherry pick the tips that resonate with you and disregard anything that doesn’t. After all, makeup is a very personal and experimental process—no one can tell you what to wear in your own circus. What works wonders for my skin type, coloring, or face shape might not be the best fit for you, and vice versa. The key is to have fun, play around, and discover what makes you feel confident and beautiful!
Double conceal
Being a hopeless insomniac means I’m practically guaranteed to wake up with unwelcome dark circles and tired looking eyes—it’s just part of the package! To combat this, I’ve developed a double concealing technique that makes a noticeable difference and since I know I’m not the only night owl around, I figured I would share my knowledge! My secret is layering concealer both underneath and on top of my foundation. I know, brilliant! Like most skin conscious queens, this is all obviously applied after my micellar water, moisturizer, and primer but you get it—it’s all about building.
Here’s how it works and why it’s effective: First, I apply a thin layer of concealer directly to the dark circle area as well as any other imperfections or discolorations. Think of this as a base layer to neutralize the discoloration. Next, I apply my foundation, carefully blending it over the concealed area. The foundation acts as a bridge, seamlessly blending the first layer of concealer into the rest of my complexion and preventing it from creasing or settling into fine lines. Finally, I add a second layer of concealer over the foundation, focusing on the areas that still need extra coverage or brightening. This layer really kicks up the coverage and ensures sleekness.
The key to this technique is ensuring that the foundation is well-blended in between the two concealer layers. This ‘sandwiching’ effect helps lock in the concealer and prevents it from shifting throughout the day. It also creates a smoother, more natural finish. I like to use a damp makeup sponge or a small, dense brush for precise application and blending. Not only does this double-concealing method amplify the coverage of dark circles, blemishes, and imperfections, but it also brightens up the entire under-eye area and face. This creates a more awake and refreshed look overall, providing a fantastic base for the rest of your makeup application. It’s a game-changer for those of us who struggle with the visible effects of sleepless nights!
Ethereal Glow
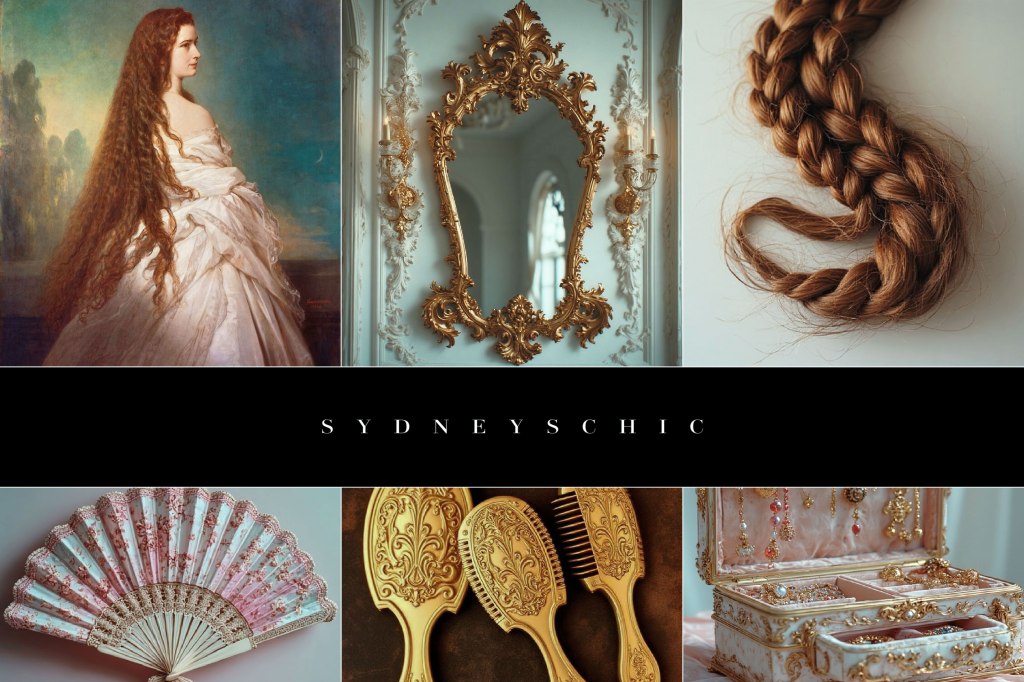
Highlighter is a makeup artist’s secret weapon for transforming flat, lackluster skin into a radiant, multi-dimensional canvas. Most artists apply highlighter to the high points of your face—think cheekbones, brow bones, the bridge of your nose, and the Cupid’s bow. The goal is to essentially catch and reflect light on the face. This highlights the natural bone structure, creating the illusion of sculpted features and adding depth where shadows might otherwise flatten the face. The subtle shimmer draws the eye upwards and outwards, instantly making your skin appear more youthful, lifted, and alive, combatting the dullness and flatness that can sometimes occur, especially under artificial lighting. I love this concept and enjoyed studying light and shadow in art class so much that I took this idea one step further in pursuit of capturing a “Pre-Raphaelite” beauty vibe which I will be dedicating an entire post to at a later date.
One of my favorite tricks for achieving that coveted dewy, luminescent glow is to blend a touch of highlighter directly into my liquid foundation before I apply it to my face. This technique works wonders for creating a subtle, all-over radiance, rather than just highlighting specific areas. For the most seamless and natural look, I recommend using a liquid highlighter that’s close to your foundation shade in terms of shade, tone, and intensity. However, don’t be afraid to experiment! You might find that a slightly warmer or cooler toned highlighter creates a beautiful effect.
Before you run out and buy something new, see what magic you can work with the highlighters already in your makeup bag. I simply mix a small amount of both products together—almost like artists blending paints—until I achieve a consistent, shimmering mixture. Then, I apply it as I normally would with my foundation. This adds a beautiful, diffused dimension to my skin, leaving it looking healthy and naturally radiant, not overly sparkly or artificial. Just remember to start with a small amount of highlighter—you can always add more if desired!
Throw Shade
Marilyn Monroe, the iconic actress whose name is synonymous with Hollywood glamour, was renowned for her meticulous and impactful makeup routine that is still studied by makeup artists and enthusiasts today. Seriously, there’s thousands of videos, articles, and tutorials about how she “supposedly” applied her face but one often overlooked yet crucial element of her look was her use of natural brown eyeliner to emphasize her lashes and make her eyes seem bigger. Brown was preferred rather than black so that it didn’t look harsh on her skin though for full glam, I imagine she did occasionally use black when the occasion called for more impact. This look was cultivated specifically for her by her makeup artist, Whitey Snyder, whom she met during her first screen test at 21th Century fox in 1946. He would continue to do her makeup for 16 years until her death, keeping his promise to do her funeral makeup.
Rather than directly applying the eyeliner to her waterline, Marilyn carefully traced a fine line beneath her lower lashline, clinging tightly to the lashes. This seemingly simple technique created a subtle shadow, ingeniously enhancing the appearance of her lower lashes, making them appear longer and more defined as well as adding to that sultry, sleepy look she was well known for having both on camera and off. This was further complimented by the use of a white eyeliner in her waterline to brighten her face.
Inspired by this classic trick, I’ve incorporated it into my own makeup routine and I don’t do my eyeliner any other way anymore. However, I prefer a slightly more diffused effect to enhance my natural features. Instead of a sharp line, I gently blend the brown eyeliner back and forth, softening the line to mimic a more natural, subtle shadow—mirroring the delicate illusion Marilyn so expertly achieved, but with a touch of modern, blended softness. This results in a naturally enhanced lash line without looking overtly made up.
White out
Another trick I always use was also passed down from iconic duo Marilyn and Whitey, involving a simple yet totally transformative tool: white eyeliner. Also, for any Star Wars fans, this makeup technique was worn by space princess, Carrie Fisher herself, as Princess Leia. I think she wore it several times throughout the original trilogy as it was a common practice in 1970’s films. White eyeliner is a staple among many makeup tutorials based on Princess Leia’s looks. I’m posting this on May 4th so she more than deserved an honorable mention—May the 4th be with you!
The key is applying it to the waterline—that delicate inner rim of your lower eyelid. The effect is truly remarkable. It’s like flipping a switch to instantly brighten your eyes, making them appear wider, more open, and infinitely more captivating. Think of it as a visual energy boost to pick you up and breathe new life back into your face! If you don’t have white, you can use a light or skin toned eyeliner pencil to achieve the same look.
This trick isn’t just for enhancing your everyday look; it’s a lifesaver during allergy or flu season. When pollen turns your eyes into a red, itchy mess, a touch of white eyeliner acts as a subtle camouflage, masking the irritation and restoring a sense of calm. Redness around the eyes can make you look tired and unwell, but the white eyeliner subtly counteracts the red, returning the visual balance to your eyes without looking unrealistic or like you’re overtly trying to cover the discoloration. For those of us who occasionally battle insomnia, it’s a secret weapon against the tell-tale signs of sleep deprivation and fatigue. Forget looking like you’ve been scrolling through shoes all night on the Ebay—a quick swipe of white eyeliner, and you’ll appear as though you’ve had a solid eight hours of beauty sleep, even if you haven’t! This works especially well with the double concealer method I mentioned above. If you have shadowed, hooded, or small eyes, brightening your eyes up with products like this white eye liner can make an even bigger, yet natural difference.
Lip locked
Let’s talk about lip products! We all know the options are endless – from a subtle gloss to a bold, statement lipstick, and everything in between, like stains and tinted balms. I personally have a whole collection of lip colors in various shades and finishes. However, for my everyday makeup routine, I rely on a simple yet effective trick that enhances my natural features and keeps my lips looking fresh all day long, preventing that dreaded fading or uneven discoloration that’s literally the kiss of death.
My secret weapon? A lip stain in a shade that closely mimics my natural lip color paired with either a matching or clear chapstick or gloss, depending on the look I’m going for that day. This combination offers several benefits: First, the lip stain provides a long-lasting base of color that acts as a safeguard. Even if the gloss or chapstick wears off throughout the day, my lips still retain a decent and flattering hue. Second, and perhaps more importantly, it subtly amplifies my natural lip color, giving it a vibrant and healthy boost without looking overly done. It’s the perfect way to achieve a polished, natural-looking lip that lasts and if it all happens to wear off during a busy day, it doesn’t look bad because it’s close to the color underneath.
You could use a long lasting lipstick near your natural shade if you preferred but a good lip stain offers a multitude of benefits that make it a must-have in any makeup bag. Unlike traditional products, lip stains leave a natural-looking flush of color that lasts for hours, defying eating, drinking, and various other activities! This long-lasting power means less time spent reapplying and more time enjoying your day. A well formulated lip stain won’t bleed or feather, ensuring crisp color all day long but try what works best!
Trial & Error
I know things have been a little quiet around here lately due to our temporary hiatus, but I couldn’t resist sharing a quick post just in time for that spring glow-up we’re all craving! As the weather warms up, it’s the perfect time to refresh our makeup routines and add a little extra radiance. Spring is for trying something new too, am I right?
I’m not sure how widely known these techniques are, so hopefully, there’s something new here for everyone! Feel free to experiment and adapt these tips to fit your personal style and preferences. Maybe you’ll find a better way to do it! I’d love to hear how you incorporate these ideas into your daily routine.
Most importantly, if you decide to give any of these a try, please let me know what you think! Tell me what worked wonders for you, what maybe didn’t quite hit the mark, and any variations you discovered along the way. Your feedback is invaluable, and it helps us all learn and improve our makeup game together. Happy face painting!

make sure you subscribe & follow to be notified of new content
©sydneyschic ┊image credit: sydneyschic ┊unsponsored post


Tell me what you think!