

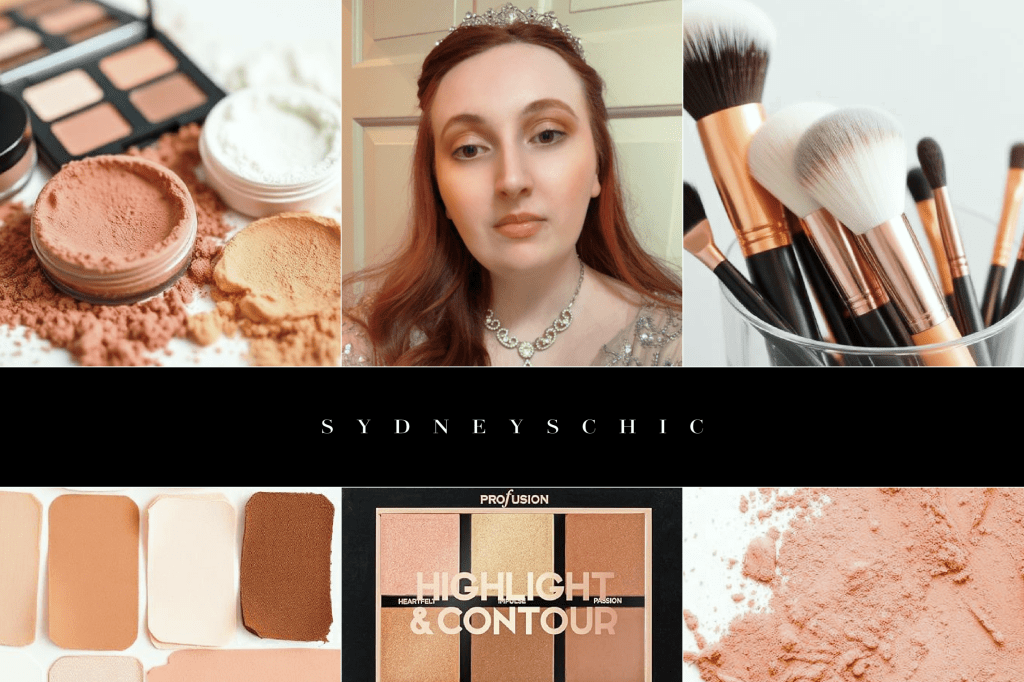
It is fall ya’ll and we are out here in these streets pumpkin spicing! Sun drenched orange evenings and pumpkin flavored everything. Leave not a single leaf left on any tree! To celebrate this aesthetic and the look that I recently wore to an event supporting a local foundation, I thought that I’d try something a little different with a makeup tutorial using some of the clean makeup featured in our clean cosmetics post here. There will also be items pictured in our clean skincare post here as part of my skin prep to get ready for my makeup.
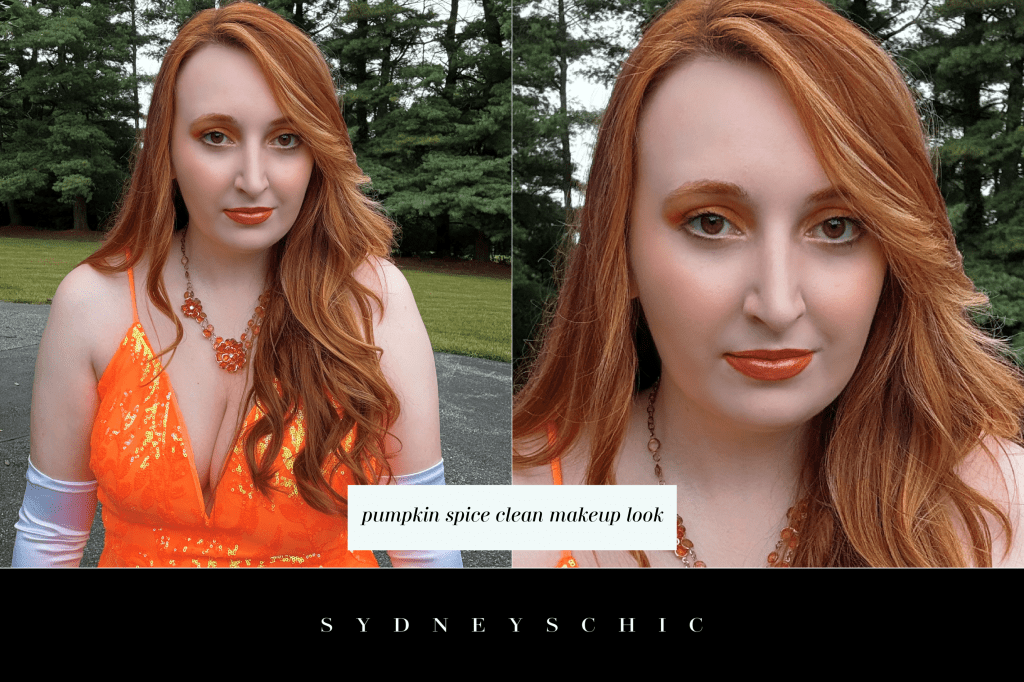
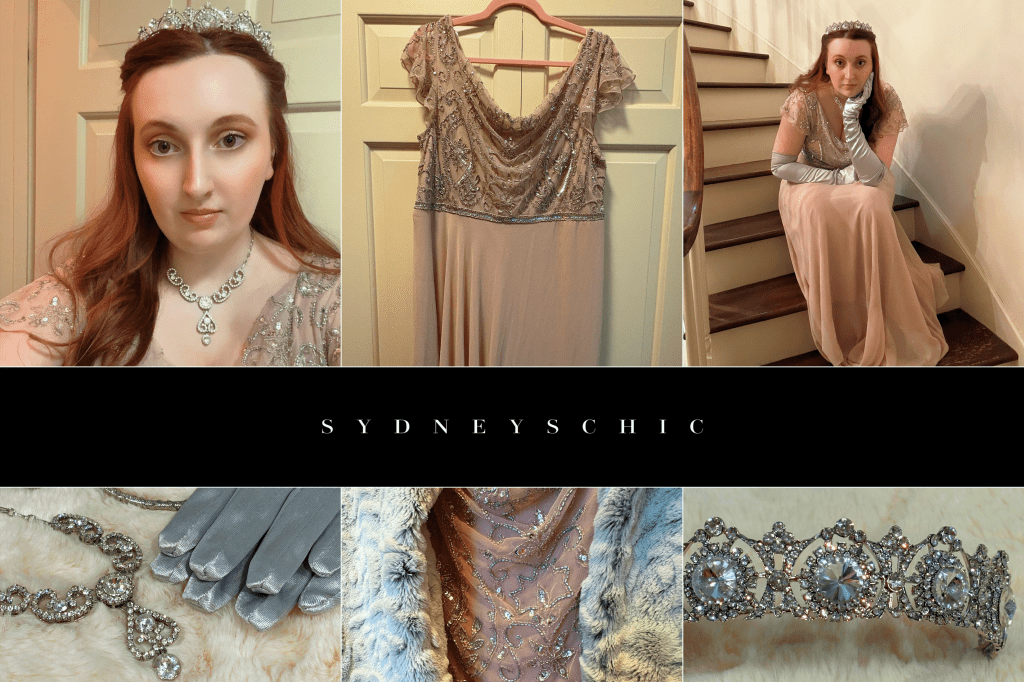
When I first had to decide what makeup I was going to do for a charity event, I knew I not only had to take my dress into consideration but the season as well. With my orange dress, it only made sense to incorporate the vibrant, rich warm hues of autumn into my final look. I really love colorful makeup with bright evening gowns however there’s a balance to be struck between a statement look and being too dramatic. Because of this, I decided to pair the saturated shades from my highly pigmented palette with some neutral metallics for a toned down yet shimmery approach to pumpkin spice makeup! Don’t worry, I’ll explain it all step by step.
This is not a sponsored post—I’m not receiving anything for this tutorial. I’m not trying to peddle any sales or commissions, I just think it would be nice to share the quality of these products for those curious about a clean makeup look. You don’t need toxic chemicals for vibrant pigments and good results!

First Tutorial
Now, I’ve never done a makeup tutorial before and I wasn’t prepared to share one so I don’t have any pictures of my process or videos of my technique but if this is content that you enjoy, let me know and I will work on it! For now, we’ll just have to work off the finished look and product pictures with notes. Who knows, maybe I’ll recreate this look on instagram! Either way, this is a completely new endeavor for me so please be kind. All products I use will be linked and bolded. There are a few products from my old makeup routine that I haven’t found a clean replacement for yet but I will point them out accordingly so you don’t confuse them.
It’s also worth mentioning that I am not a makeup artist nor do I have any professional training or skill in this art. I am literally just a woman trying to be a woman and that’s about it. Sometimes my makeup turns out great and other times I look like a sad clown—that’s the reality of playing with face paints. I’ve watched a few videos and always done my own makeup for the events that I attend but this is not my specialty with the exception of one. My only knowledge comes from the experience of doing my own makeup. Take everything that I say through the lense of suggestion rather than professional advice and feel free to make your own personal changes to suit you.
I’m dedicating this post to my auntie who has always encouraged me to share my makeup and complimented my looks when we hit the town—this is for you, girl!
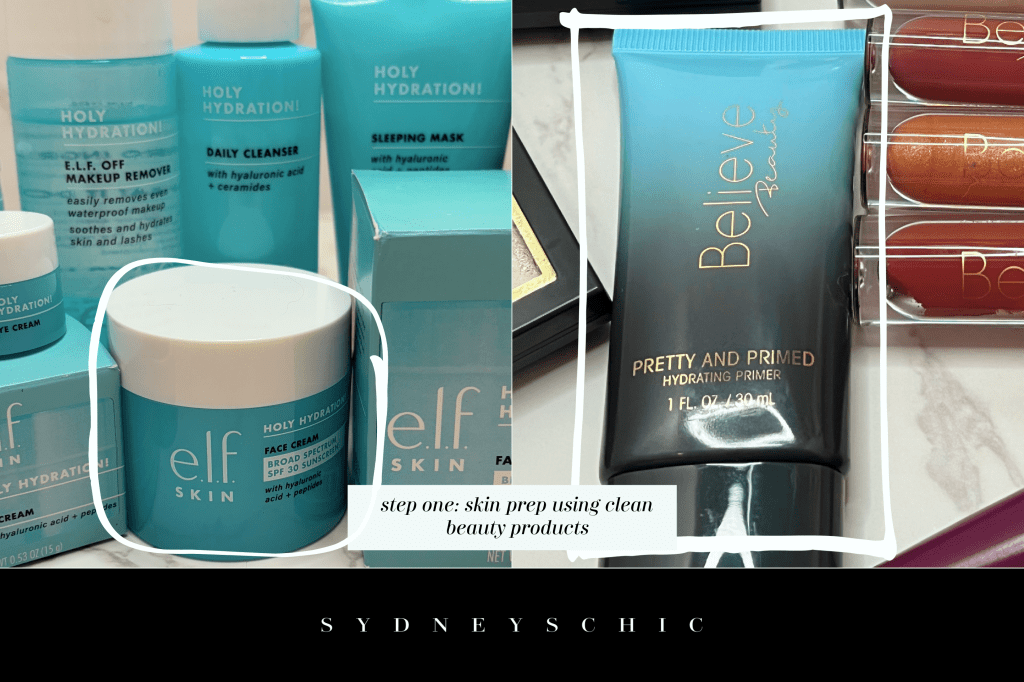
Step one: Skincare prep
Rather than fully washing my face everyday with cleanser, I use micellar water on a cotton pad to clean my skin without it drying out. Micellar water is a great alternative to drying cleansers because it cleanses and hydrates at the same time so that your skin isn’t just clean, it’s gotten a good plump! The drugstore product that I use is Garnier SkinActive Micellar Water with Rose Water which is made of natural ingredients including rose, a proven remedy for skin inflammation. This rose miscellar water is also free of parabens, clean, hypoallergenic, and safe for sensitive skin!
Once I’ve used my miscellar water and let it soak into my skin, I usually drink something like water or white cranberry strawberry juice to hydrate and help with inflammation or I’ll heat up my curling iron. I always do my hair in between my skincare to give everything time to properly absorb without rushing. If you don’t, you can get pilling and excess cream left on your skin which can cause an uneven base for your foundation.
After my skin is clean and plumped, I use the Holy Hydration Face Cream and Eye Cream from E.l.f to make sure I lock in that moisture before I actually start applying any makeup. Fine lines be gone, am I right? Both of these products are clean and have been featured on this blog in our clean skincare post if you want to read about the rest of the Holy Hydration line. If your skin is really dry, switch the face cream for the Holy Hydration Sleeping Mask instead which holds more moisture than the regular cream and is good for those desert days.
Again, I let all of this absorb into my skin and busy myself by getting the rest of my palettes and brushes ready. By the time my skin is fully prepped, so am I!
The last step of my skincare prep is to use a primer if I’m going to be doing my makeup which in this case I obviously was. The product that I have been using is the clean Pretty and Primed Hydrating Primer from Believe Beauty but I don’t think it’s available anymore. I suggest this affordable alternative from E.l.f or something similar.
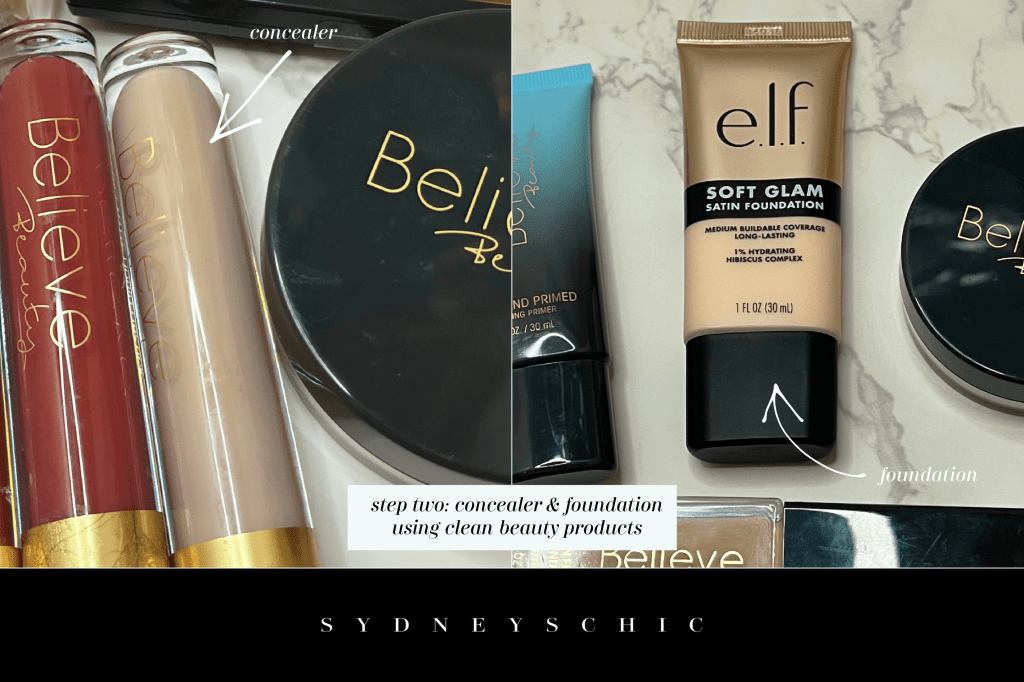
Step two: Concealer & Foundation
I always conceal under by eyes along with any discolorations or blemishes and blend it out using a damp beauty blender or a makeup sponge. The concealer that I’ve been using is the clean You’re Covered Concealer by Believe Beauty in the lightest shade, ivory. Again, I don’t know that it’s still available so I’ll share the replacement I end up getting when I find a good one!
After I’ve concealed, I use the Soft Glam Foundation by E.l.f in the shade, 10 fair cool which I blend into the concealer with the same sponge—I always use the same sponge for my base (concealer, foundation, and highlight) so that it all mixes and blends together seamlessly.
I conceal under my eyes and blemishes for a second time to ensure that I’ve covered any dark circles and discolorations well. If I’m honest, I’d rather use more concealer than a heavy foundation all over because I feel it looks more natural but that’s just my opinion!
While I’m blending everything out, I lightly blend some liquid highlighter into my full face foundation for a dewy sheen—but do this carefully and don’t use too much highlighter! The clean liquid highlighter that I use is the Luminous Glow Liquid Highlighter from Profusion Cosmetics in the shade, Blossom. The other liquid highlighter I use that is one of the few products I’ve kept from before I transitioned to clean beauty is the Revlon Colorstay Endless Glow Liquid Highlighter in the shade, Opal. The small applicator makes it perfect for highlighting eye inner corners and small spaces like the cupid’s bow.
Always start with less and build more if you need to. We just want to give some life to our skin, not look like a disco ball. I detailed this art here in another post.
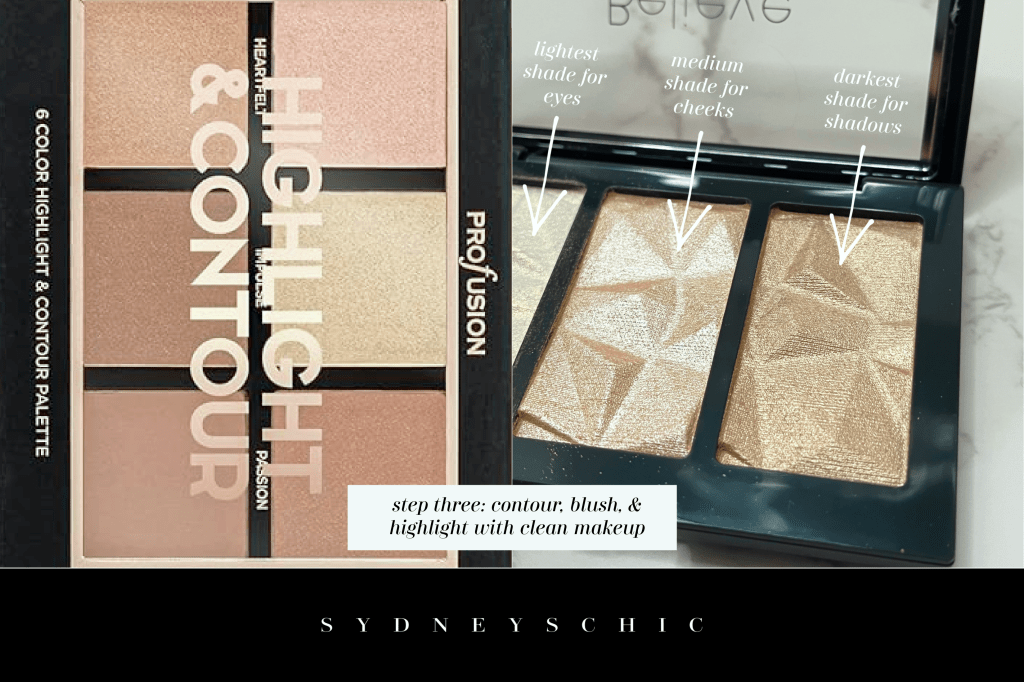
Step Three: Contour, Blush, & Highlight
Before I begin this next step, please note that I am extremely fair skinned and so I have to be very light with all of my blushes and contour so I don’t look like I just escaped a circus. I suggest that you do your regular contour that works for your skin tone and face shape but I will explain my process anyway for beginners.
For this look, I used the Studio Icon Collection & Highlight palette from Profusion Cosmetics which I thought was clean but is not—however it is a vegan product. To contour my face, I took the lightest dark shade, Devoted, on a large angled brush and lightly hollowed out my cheeks by brushing the powder just below my cheek bones and pulling upwards towards my temple. Then I blended it into my foundation using my sponge from earlier with all of my previous base products to lighten it to a more natural shadow.
Now, I do not like my blush very much because I feel like it doesn’t blend as well as other products I’ve used however I haven’t had the time to find a better one yet so I will link it anyway since it’s a clean beauty product—it may work better for you! Using the 6 Color Blush Palette from Profusion Cosmetics, I took the orangest shade, Alive, and brushed it lightly across the middle of my cheek upwards following the natural curve of my cheek bone. Any fallout powder I either blended or used the first sponge with my base colors to recover.
I already mixed liquid highlight with my foundation for an all over sheen but I always like to go in with a powder highlighter after all the powdering is done to see what I’m left with. I used the clean Luminizing Glow Trio Highlighter from Believe Beauty in the color, Cloud Nine.
When I highlight, I use the lightest colors in the lightest areas and the darkest colors in the darkest areas. I always use the lightest color in the corner of my eyes and below my brow bone to catch the light. I bush the medium color over my blush and highlight the top of my contour. The darkest color is used if my contour is too dark to lighten it or to contour any shadows of my face I feel that I missed.
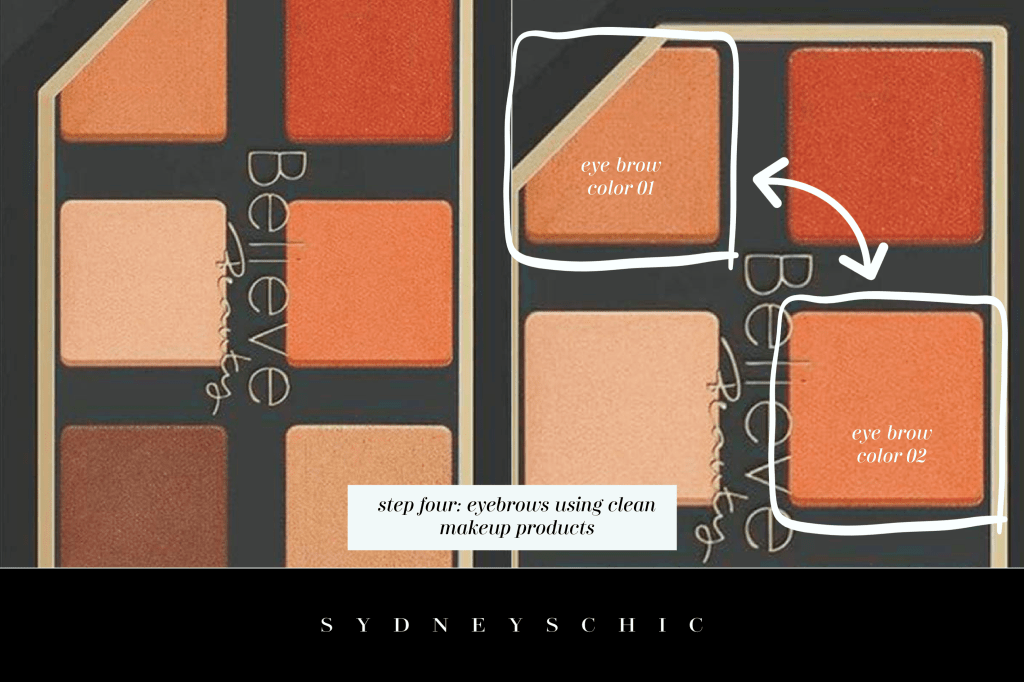
Step Four: Eyebrows
My eyebrows are actually really easy because I tint them with dye so I don’t have to spend a lot of time messing with them every time I do my makeup. The payoff is longer and it just saves me time. I’m just not the type of girl that’s going to spend half of my makeup time on my brows unless it’s a special event, alright? Tint and go!
I get this done when I’m at the salon and in between visits, I do it at home using this temporary tint, Color Gloss Up Temporary Hair Dye from Clariol in the shade, Terra Copper. This gloss is also great for hair that fades or those suffering with water issues that damage your hair’s color—natural or not. If you have bristly brows, dye keeps them softer and more kempt.
A natural brow is my preference and don’t like when my brows look too powdery, chalky, or overdone. However, in this look and when I’m going to an event, I use a blend of two copper eye shadows from the clean Sultry Sunset Eyeshadow Palette by Believe Beauty to define them. You may wonder why I used eye shadow instead of a brow product and the answer is that when you have vibrant hair, it can be difficult to find a brow product that matches your color and for me it’s actually easier to use a blush or eye shadow and just blend it well. I know it’s weird but that’s life, baby.
I do have an eyebrow pencil that I have used for the last thousand years so it is from before my clean beauty era. I used the LA Colors Wowie Browie Precision Smudge Proof Eyebrow Pencil in the shade, light/medium to blend with the copper powder. We love a good brow pun, don’t we?
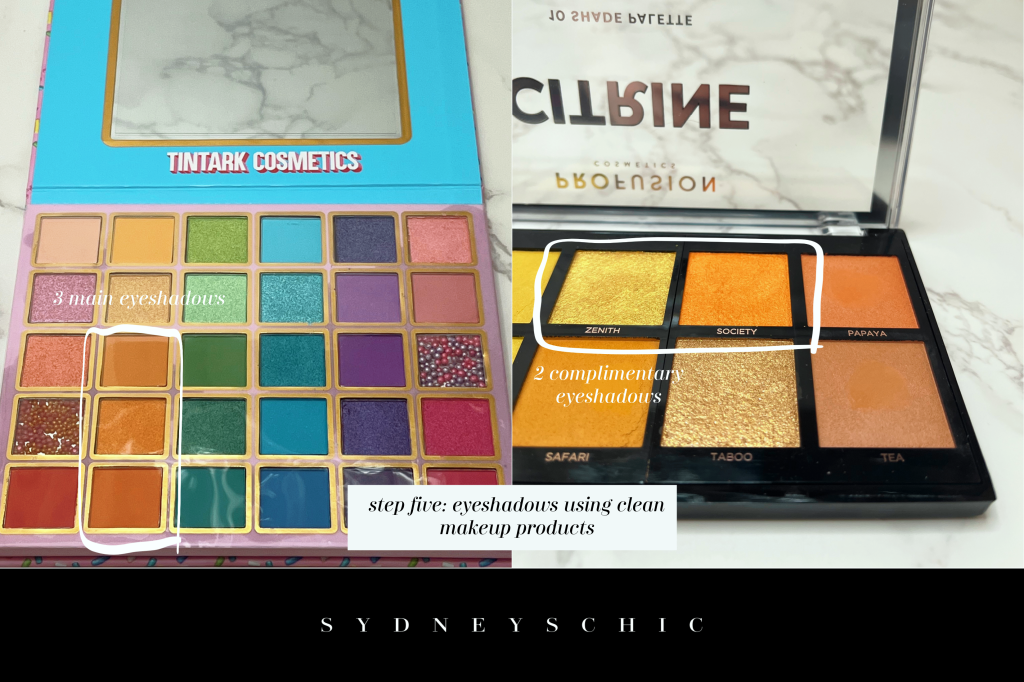
Step Five: Eyeshadow
I’m so excited to show a look with the clean eyeshadow palettes that we already discussed! I think clean makeup has a bit of a reputation for being less pigmented and lower quality. I have not found either rumor be true in the ones that I’ve used—especially for this look which required high saturation to be successful.
To start with my eyes, I especially applied some of my primer from earlier to my lids and let it dry while I got the rest of my palettes ready. I wanted shades of orange that were bright but not too overwhelming. My rule for eye shadow is to always apply the lightest color closest to the inner corner of the eye where the white highlighter starts and then gradually darken in color as you work towards the crease and outer corner. This creates a natural fade and the darker colors fit well into the shadows of your face created by eye.
I applied a base color of eyeshadow which is basically a matte skin color to build on and will help with blending later. I used the first and lightest color in the clean Nearly Nude Eyeshadow Palette by Believe Beauty.
Once I covered my eye, I took the lightest orange color Tintark’s Cloudy With a Chance of Sprinkles Eyeshadow Palette and and dusted it over my whole lid over top of the base color. I slowly built up the pigment where I wanted it because less is definitely more when you’re creating a colorful look like this. The key is to layer slowly and lightly press the color to your lid until it’s the color you want. Also, have a separate eyeshadow brush for light and dark colors so you have more control over your blending.
Next, I took a new brush with the darkest orange in the clean Tintark palette and pressed it to the outer corner of my eye and wiped away any fallaway with makeup remover and spot cleaned with concealer. With the lightest and darkest colors placed in the outer and inner corners of the eye, you can now focus on the center and blending everything together seamlessly. Using the second darkest orange in the Tintark palette and the same brush as the darkest shadow, I blended the darkest and lightest oranges together for a sunset ombre affect.
Though I liked the look, I felt it wasn’t quite as shimmery as I wanted so I took the Citrine Eyeshadow Palette from Profusion Cosmetics and used the shade, Society, to blend all of the oranges. Then I used the shade, Zenith, from the same palette to lightly press some gold on top of the center of my lid and went back with the first lightest Tintark Color to press them together and brightened up my inner corner highlight one last time with the Believe Trio.
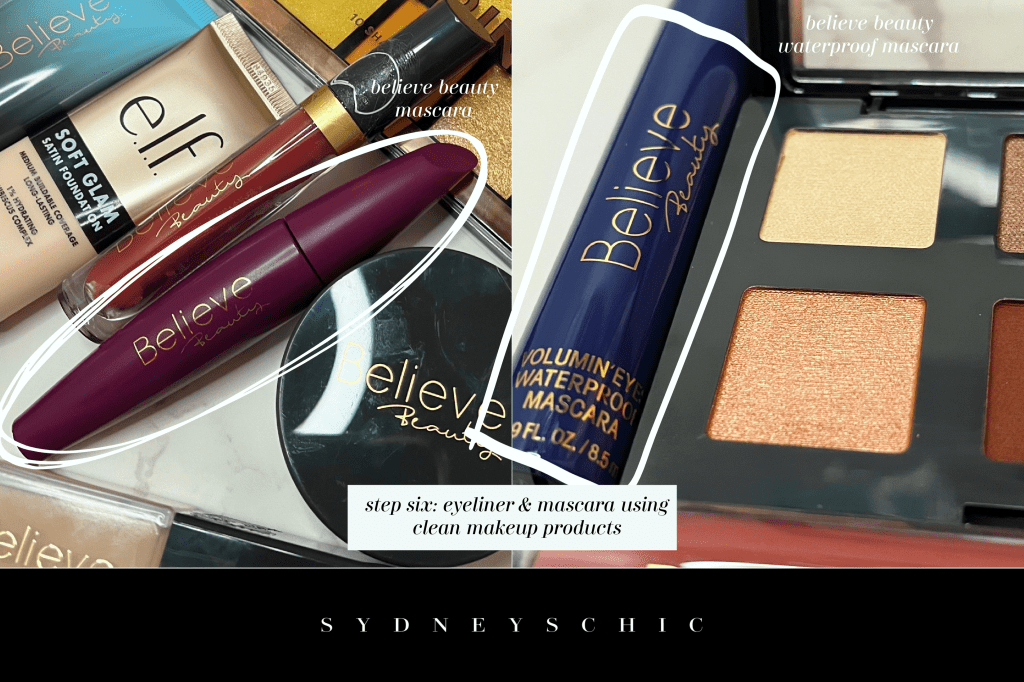
Step Six: Mascara & Eyeliner
As I’ve mentioned before, I always start with a white eyeliner in my water line to hide any irritation or tiredness. The white just makes you look more alive, awake, and bright eyed. The eye pencil I used is left over from before my clean beauty days and it is L’Oreal Paris Infallible Grip Mechanical Gel Smudge Resistant Waterproof Eyeliner Pencil—I know, a mouthful. I haven’t found a clean brand replacement for this yet because it’s a really good product but I’m looking! The shade I use is called, Polar White.
Once I’ve lined my waterline, I use another product from my former life, the Perfect Blend Eyeliner by Covergirl in the shade, black/brown. I draw this in my lower lash line beneath the white in my waterline. Using the small sponge on the back of the pencil, I soften and smudge the line to create a natural looking shadow under my lashes to lengthen them. Again, I am most particular about my eyeliner and I just haven’t found replacements that I like for these yet. If I wear no other makeup, I’m almost always wearing eyeliner if I’m out—it’s the most important step.
I don’t do any eyeliner across the top of my eye due to irritation and I feel like having a thick black line across your upper lashes can make the hollow of your eyes bigger and your eyes look smaller. That’s why I use the white liner in my waterline to create an illusion that my eyes extend farther down and round them out rather than shorten their length with something like a cat eye. Everyone has their own preferences but I feel this works best for my face shape.
For my first layer of mascara, I used the clean black High Volume Mascara by Believe Beauty. I always lightly move the brush through my lashes to keep them separated and if they clump, I push them apart using the end of my mascara wand. Beauty icon, Audrey Hepburn, used to use a sewing needle to individually separate her lashes which is where I got the idea!
It was raining when I did this look so I went over this mascara with a second waterproof one to seal in the product. The clean waterproof mascara that I used is Volumin Eyes Waterproof Mascara by Believe Beauty in black. Again, I separated my lashes to make sure they weren’t shortened by clumping.
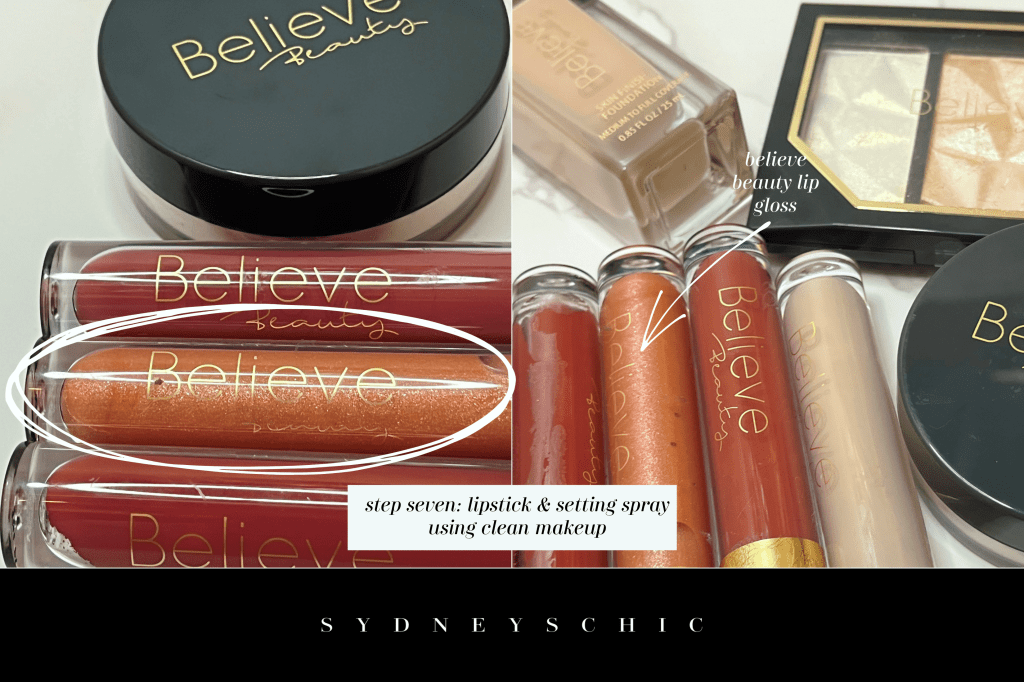
Step Seven: Lips & Setting Spray
I always line my lips with a color close to my natural color and then build on it with other products. I can’t tell you which liner I use because the name wore off and I got it from a kit awhile ago. I like it but it’s one of those products that you use until it’s done and then reevaluate if you’re going to get it again or try something new.
Once I lined my lips, I used the Super Stay Matte Lip Ink from Maybelline in the coppery shade, Mediator, as my lipstick. Most lip stains are drying so I had to pick out a gloss to pair with it. I’ll be completely honest in saying that when it comes to my lips, I really need to use stains especially if I’m doing my make up for a night out. I haven’t found many clean brands that offer lip stains or if they do, not in the colors that I need. I’m always looking but this is not a clean beauty product.
After I used the lipstain, I went over it with the most beautiful lip gloss I have ever found in my life. It’s the clean Lustrous Shine Lip Gloss by Believe Beauty in the shade, Ethereal. I will be devastated if Believe Beauty no longer sells this one. Not only is it my absolute favorite but my mother has stolen it as well.
When everything was done, I used the clean Dewy Coconut Setting Mist by E.l.f. I love this setting spray! It keeps my look in place all night and it smells lovely. My only complaint is that I must’ve gotten a faulty bottle so every time I go to use it, it doesn’t spray, it spits at me. Other than that, it’s a fabulous addition to my makeup bag!
Last Call
Wow, we’ve reached the end! I honestly cannot thank you enough for sticking around and reading through my very first official makeup tutorial here on the blog. It was a true labor of love to write out every single step and your support in viewing it means the absolute world to me. If you like this kind of content, let me know and I’ll add it to the rotation of our regularly scheduled programming around here.
I truly adore this finished result—the ‘Clean Pumpkin Spice.’ Sharing the exact process, from primer application to the final spritz of setting spray, was incredibly rewarding. If there’s one takeaway from this whole journey, it’s the sheer power and reliability of the clean beauty routine I’ve adopted. The high-performance, non-toxic products definitely delivered on their promise of radiance and longevity!
Whether you came here simply for a little inspiration, you are meticulously planning your look for an upcoming seasonal event, or you’re specifically searching for that perfect, glowing cosmetic compliment to your rich autumn aesthetic, I sincerely hope that you picked up a few tips and tricks. Stay glowing, stay spicy, and I’ll catch you in the next post! Happy fall!

make sure you subscribe & follow to be notified of new content
©sydneyschic ┊image credit: sydneyschic ┊unsponsored post


Leave a reply to impossiblydefendor9032ca81ea Cancel reply